Hybrid work is here to stay, and with it comes a non-negotiable expectation: crystal-clear, reliable video conferencing. Whether you’re onboarding new employees, pitching to clients, or collaborating with distributed engineering teams, the room you take those calls in can make or break the experience. In this guide, Creation Networks’ AV integration experts walk you step-by-step through planning, designing, and installing a video-conferencing space that keeps in-person and remote participants equally engaged.
Why Purpose-Built Matters
Most organizations first tried to make do with a laptop on a boardroom table. The result? Poor framing, echoey audio, awkward eye lines, and endless “Can you see my screen?” interruptions. A purpose-built room:
- Delivers studio-quality audio and video, reducing meeting fatigue.
- Sends the right brand signal to customers and new hires.
- Cuts recurring IT tickets because the technology just works.
- Increases adoption of hybrid work policies.
By the end of this guide, you’ll know exactly how to create that experience.
Phase 1: Define Your Requirements
Before you shop for cameras or run cable, document why the room exists and who will use it.
- Meeting Types – Daily stand-ups, quarterly board meetings, webinars? Each use case influences camera field of view, microphone pickup pattern, and content-sharing needs.
- Room Capacity – A six-person huddle space differs drastically from a 20-seat executive boardroom. Square footage, ceiling height, and table shape dictate acoustic treatment and lens selection.
- Collaboration Platforms – Zoom Rooms, Microsoft Teams Rooms, Google Meet, or a platform-agnostic approach? Native rooms simplify workflow, while BYOD (bring-your-own-device) offers flexibility.
- User Skill Level – If executives will self-start the room at 7 a.m., you’ll prioritize a one-touch interface. For IT-supported rooms, richer control surfaces are acceptable.
- Budget & ROI Timeline – Capital expense vs. operational expense, leasing vs. buying, and depreciation schedules all shape specification choices.
Document answers in a shared requirements brief; it will serve as the single source of truth for stakeholders, designers, and installers alike.
Phase 2: Space Planning & Acoustics
Sightlines
- Place the main display so the furthest seat is no more than 6× the screen height away.
- Align cameras at eye level of seated participants to create natural eye contact with remote users.
Furniture Layout
- Choose a table shape that complements camera framing. For 120° lenses, a curved boat-shaped table keeps all faces equidistant.
- Leave at least 36 inches of clearance behind chairs for ADA compliance and comfortable movement.
Acoustic Treatment
Glass walls, concrete, and high ceilings look chic but wreak havoc on audio. Combat it with a combination of:
- Absorption – Fabric panels, acoustic ceiling tiles, or even art-panel absorbers reduce reverberation.
- Diffusion – Bookshelves or slatted wood walls scatter reflections, making speech clearer.
- Isolation – Door gaskets and floor sweeps stop corridor noise from entering the room.
Aim for an RT60 (reverberation time) below 0.5 seconds for small rooms and below 0.7 seconds for larger ones.
Phase 3: Selecting Core AV Hardware
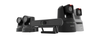
1. Cameras
- Auto-Framing Cameras – Ideal for dynamic discussions. They detect faces and automatically pan, tilt, and zoom.
- PTZ Cameras – Offer granular control and presets for multiple scenes, useful in large multi-purpose rooms.
- Multi-Camera Arrays – Provide near-face-to-face angles, perfect for high-stakes boardrooms.
Resolution should be at least 1080p; opt for 4K if budget allows to future-proof and enable post-cropping.
2. Microphones & DSP
- Ceiling Array Mics – Keep tables clutter-free and use beamforming to track speech. Pair with a DSP (digital signal processor) for echo cancellation.
- Tabletop Boundary Mics – Budget-friendly for small rooms. Choose models with cardioid patterns to minimize HVAC noise.
- Wireless Lavalier Systems – Great for presenters who move around. Ensure the receiver integrates with the room DSP.
Target STIPA (Speech Transmission Index for Public Address) scores above 0.6 for intelligibility.
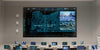
3. Displays & Projectors
- LED/LCD Panels – Up to 98″ displays provide crisp imagery in well-lit rooms.
- Ultra-Short-Throw Projectors – Useful where wall space exceeds elevator capacities for large panels. Pair with ambient-light-rejecting screens.
- Interactive Touch Displays – Combine whiteboard functionality and content sharing, boosting collaboration.
4. Speakers
Distributed ceiling speakers create even coverage. In premium rooms, consider low-profile micro-line-arrays to keep voices localized to the display.
Phase 4: Lighting Design
Good lighting makes $1,000 cameras look like $10,000 cameras. Follow these guidelines:
- Key Lighting – Soft, diffused fixtures at 45° angles to faces reduce shadows.
- Fill Lighting – Balances contrast ratios; LED light bars behind the camera work well.
- Back Lighting – Separates the subject from the background, adding depth.
- Color Temperature – Stick to 4000–4500 K for a neutral, professional tone that matches most office environments.
Pro Tip: Avoid mixing fluorescent and LED sources to prevent color mismatches on camera.
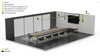
Phase 5: Network & Infrastructure
- Bandwidth – Each 1080p stream can consume up to 3 Mbps. For a six-camera immersive room, provision 50 % more than calculated peak usage.
- VLAN Segmentation – Place AV devices on a dedicated VLAN with QoS policies to prioritize real-time traffic over bulk data.
- Power – Use PoE+ for cameras and networked Wall Control Panels to reduce AC outlets and keep cabling clean.
- Cable Pathways – Run shielded Cat6A for network and HDBaseT, and fiber for 4K/60 Hz signaling over 100 feet.
Phase 6: Control Systems & User Interface
The number-one complaint IT teams receive about conference rooms is “I can’t get it to work.” Solve that with intuitive control.
- Touch Panels – One-touch join buttons synced with your calendar.
- Occupancy Sensors – Wake up the system when someone enters, and power down after meetings to save energy.
- Preset Automation – Lighting dims, shades close, and the camera zooms to default framing when a call starts.
- Remote Management – Cloud dashboards let IT push firmware updates and monitor device health across campuses.
Phase 7: Installation Best Practices
- Mic Placement – Ceiling arrays should hang where people sit, not where tables might one day move. Use laser plumb lines during installation.
- Cable Management – Label both ends, follow BICSI color codes, and use velcro—not zip ties—to allow future adds and moves.
- Commissioning – Run pink-noise sweeps and adjust EQ on the DSP. Validate camera presets from every seat.
- User Acceptance Testing (UAT) – Invite real users to simulate meetings and note friction points.
Ongoing Maintenance & Support
- Proactive Monitoring – Schedule automated tests at 2 a.m. to check camera feed, mic functionality, and network latency.
- Firmware Management – Keep an inventory of current versions and set reminders for vendor release cycles.
- User Training – Produce a 90-second video tutorial and place a QR code on the table for instant access.
- Refresh Cycles – Budget to update core components every 4–5 years to leverage new codecs and security improvements.
Budgeting & ROI
While costs vary, AVIXA’s 2023 research shows a median spend of $3,500–$5,000 per seat for enterprise-grade rooms. Here’s how organizations recoup:
- Reduced Travel – Save on airfare and lodging as more client meetings move virtual.
- Higher Employee Retention – Quality hybrid experiences keep top talent happy.
- Shorter Sales Cycles – Clear communication accelerates decision-making.
Use these metrics to build a business case for the C-suite or finance department.
Final Checklist Before Go-Live
- ✓ Acoustic treatment installed and RT60 measured.
- ✓ Camera presets saved and tested.
- ✓ DSP tuned; STIPA score ≥ 0.6.
- ✓ Lighting scenes calibrated and saved.
- ✓ Control panel and occupancy sensors operational.
- ✓ Network QoS rules applied and verified.
- ✓ Documentation handed off to IT and Facilities.
Conclusion: Make Hybrid Work, Work
A well-designed video-conferencing room is more than technology—it’s a strategic asset that connects people, accelerates projects, and amplifies your brand. By following the phases outlined above and partnering with a seasoned integrator like Creation Networks, you can deliver a Hollywood-grade experience that simply fades into the background, letting your team focus on what truly matters: collaboration and innovation.
Ready to start your project? Contact our design team for a complimentary consultation and space assessment today.